Part 1: First attempt at graphics
January 2, 2024
Still working on replacing my MS Paint diagrams
In my attempt to become better at C programming, I've decided to explore some about computer graphics. I've always been interested on how games are rendered to a screen and it turns out that a lot more math is involved than I initially expected. The main goal I had for this project was to use as few libraries as I possibly could. This means no game engines. All I used was SDL2 and the C standard library.
Triangle
The first thing you do when working with graphics is draw a triangle to the
screen. It's like the "Hello, world!" for graphics. Most of my time was spent
learning what a static library is and dealing with many linker errors. The
biggest change from the modern languages I usually use is that C doesn't have a
package manager which means you need to download and drag the static libraries
you want to use to the lib and include folders. I just symlinked my
installation of SDL into the folders. I spent an additional hour figuring out
the correct values for the Makefile and I ended up with the following that I've
been using for all of my SDL projects.
SRC_DIR = src
BUILD_DIR = build/debug
CC = gcc
SRC_FILES = $(wildcard $(SRC_DIR)/*.c)
OBJ_NAME = play
INCLUDE_PATHS = -Iinclude/GLFW
LIBRARY_PATHS = -Llib
COMPILER_FLAGS = -std=c17 -Wall -Wextra -Werror -O0 -g
LINKER_FLAGS = -lglfw3

all:
	$(CC) $(COMPILER_FLAGS) $(LINKER_FLAGS) $(INCLUDE_PATHS) $(LIBRARY_PATHS) $(SRC_FILES) -o $(BUILD_DIR)/$(OBJ_NAME)
Drawing a triangle with SDL is quite simple. I initialized a window and renderer, then I created an array of SDL_Vertex types of length.
if (SDL_Init(SDL_INIT_EVERYTHING) > 0) {
    printf("SDL_Init failed with error: %s", SDL_GetError());
    return EXIT_FAILURE;
}

state.window = SDL_CreateWindow("SDL", SDL_WINDOWPOS_UNDEFINED, SDL_WINDOWPOS_UNDEFINED, SCREEN_WIDTH, SCREEN_HEIGHT, SDL_WINDOW_SHOWN);
state.renderer = SDL_CreateRenderer(state.window, -1, SDL_RENDERER_ACCELERATED | SDL_RENDERER_PRESENTVSYNC);

SDL_Vertex vertices[3] = {
    { { 400, 150 }, { 255, 0, 0, 255 }, { 0 }},
    { { 200, 450 }, { 0, 0, 255, 255 }, { 0 }},
    { { 600, 450 }, { 0, 255, 0, 255 }, { 0 }},
};
After this, SDL needs a event loop and the basic actions that need to be done are to listen for events (i.e. detect keypresses), set the drawing color, clear the display, render the triangle, and then draw to the display.
int running = 1;
while (running) {
    SDL_Event ev;
    while (SDL_PollEvent(&ev)) {
        if ((SDL_QUIT == ev.type) || (SDL_KEYDOWN == ev.type && SDL_SCANCODE_ESCAPE == ev.key.keysym.scancode)) {
            running = 0;
            break;
        }
    }

    SDL_SetRenderDrawColor(renderer, 0, 0, 0, SDL_ALPHA_OPAQUE);
    SDL_RenderClear(renderer);
    SDL_RenderGeometry(renderer, NULL, vertices, 3, NULL, 0);
    SDL_RenderPresent(renderer);
}
Finally, we need to clean up our structs at the end to prevent any memory leaks.
SDL_DestroyRenderer(renderer);
SDL_DestroyWindow(window);
SDL_Quit();
This is all that it takes to draw a triangle with SDL. Here is the result!
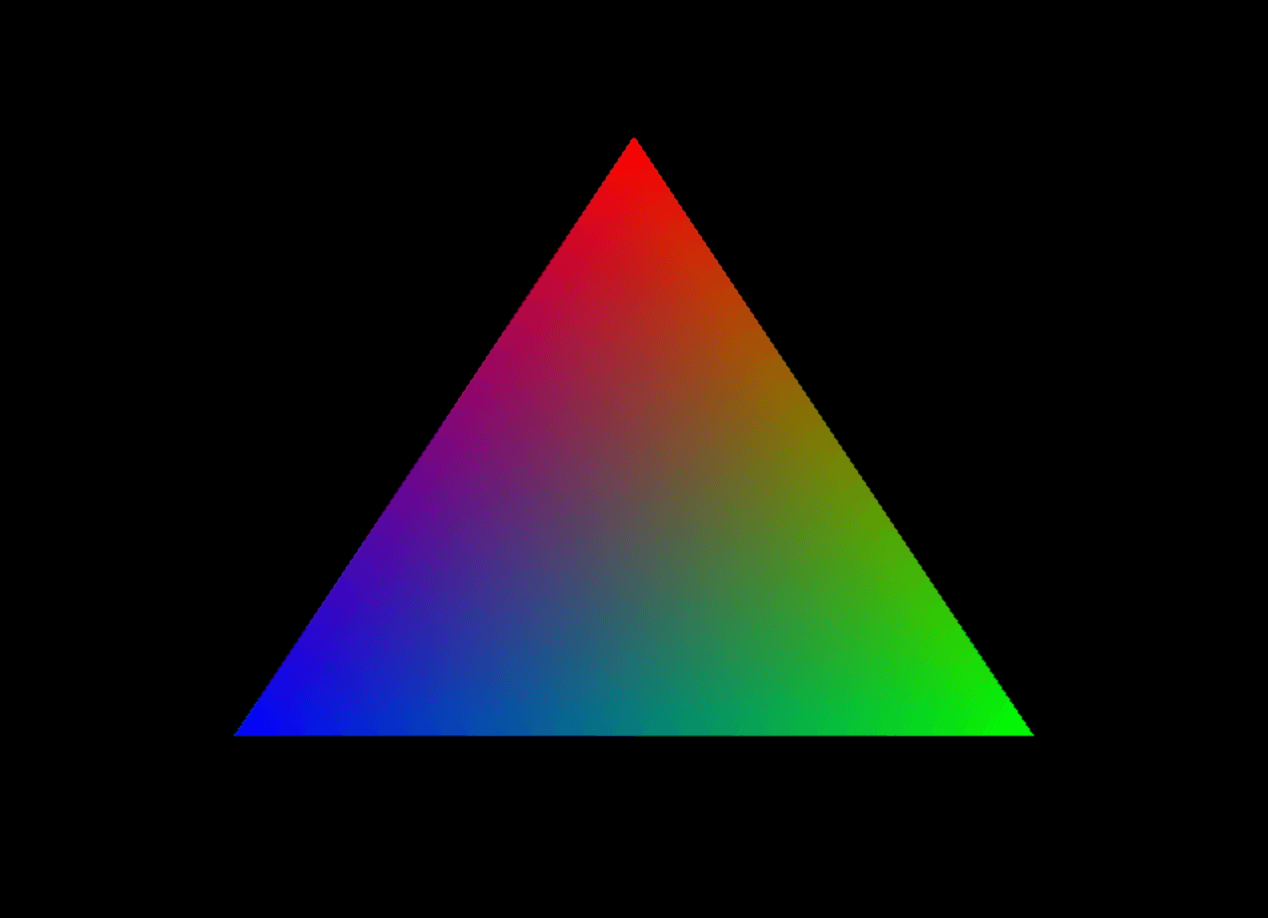
Notice that each corner is colored differently. These colors were set when the SDL_Vertex array. The second data field has the type SDL_Color, and all of the pixels in-between the corners are colored automatically.
Exploring 3D Walls
I want to get more into 3D graphics and the first step is to learn how 3D models are projected onto a 2D screen. Before moving on, I reviewed some of the math behind perspective. To make things simple, the only thing that is rendered for this first iteration are straight walls standing straight up. This means that every wall can be drawn with a series of vertical lines. Additionally, the height of these vertical lines will depend on the distance from the camera. This is important concept that will be used for future parts as well. The further away a part of the wall is, the shorter the line should be, since things further away appear smaller.
This means the height of the wall is inversely proportional to the distance from the camera. Since we're assuming the camera is at half the height of the wall so given a height, we will only need to draw the column centered vertically. Let's visualize a simple example. I used Desmos to model a top down view of the situation I wanted to render.
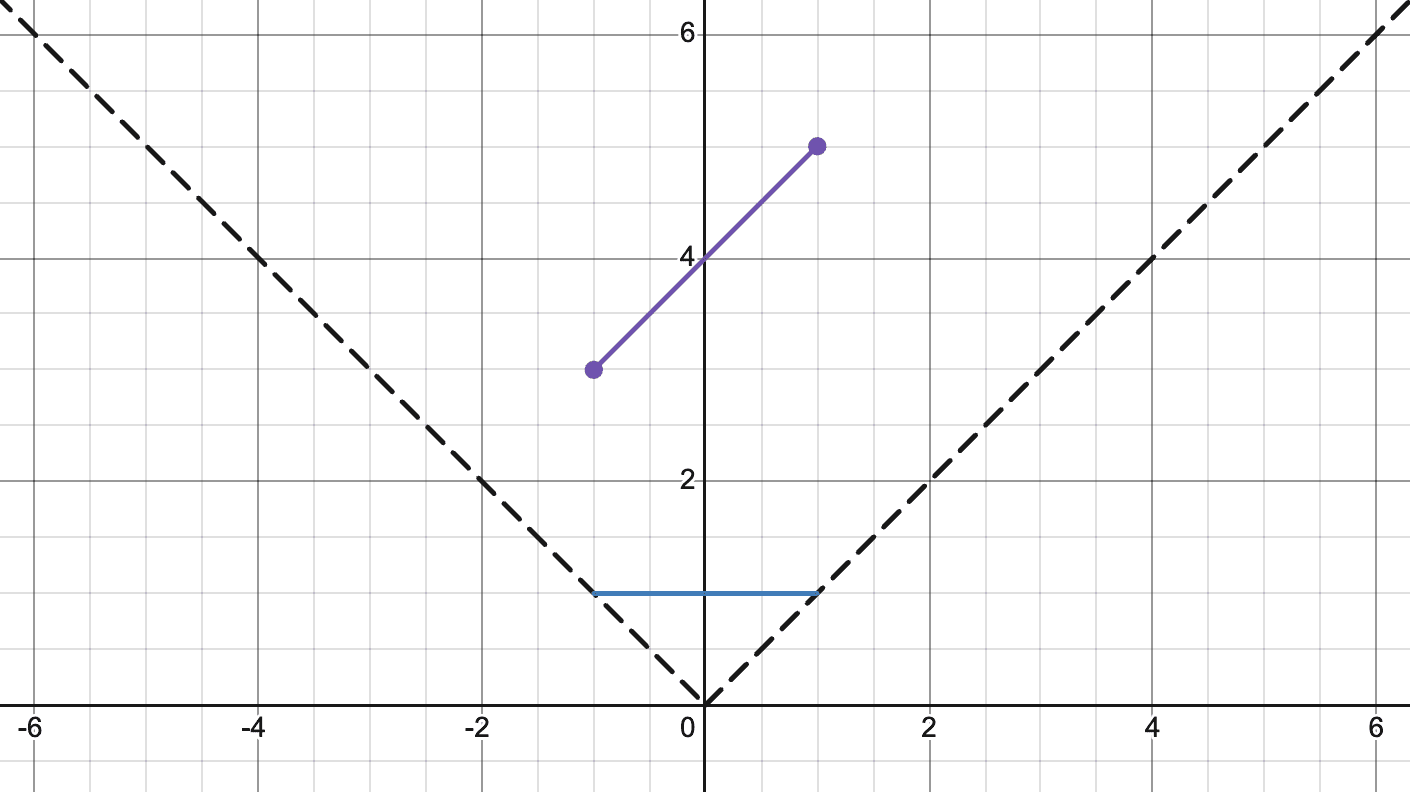
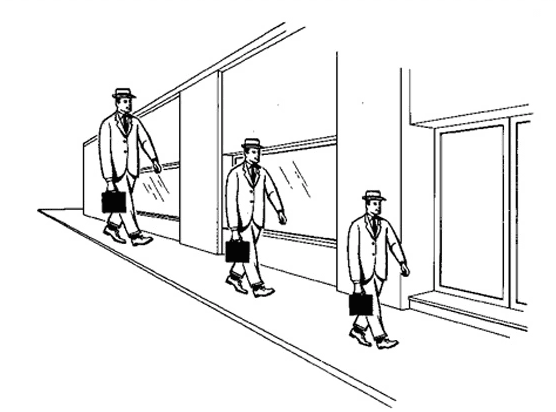
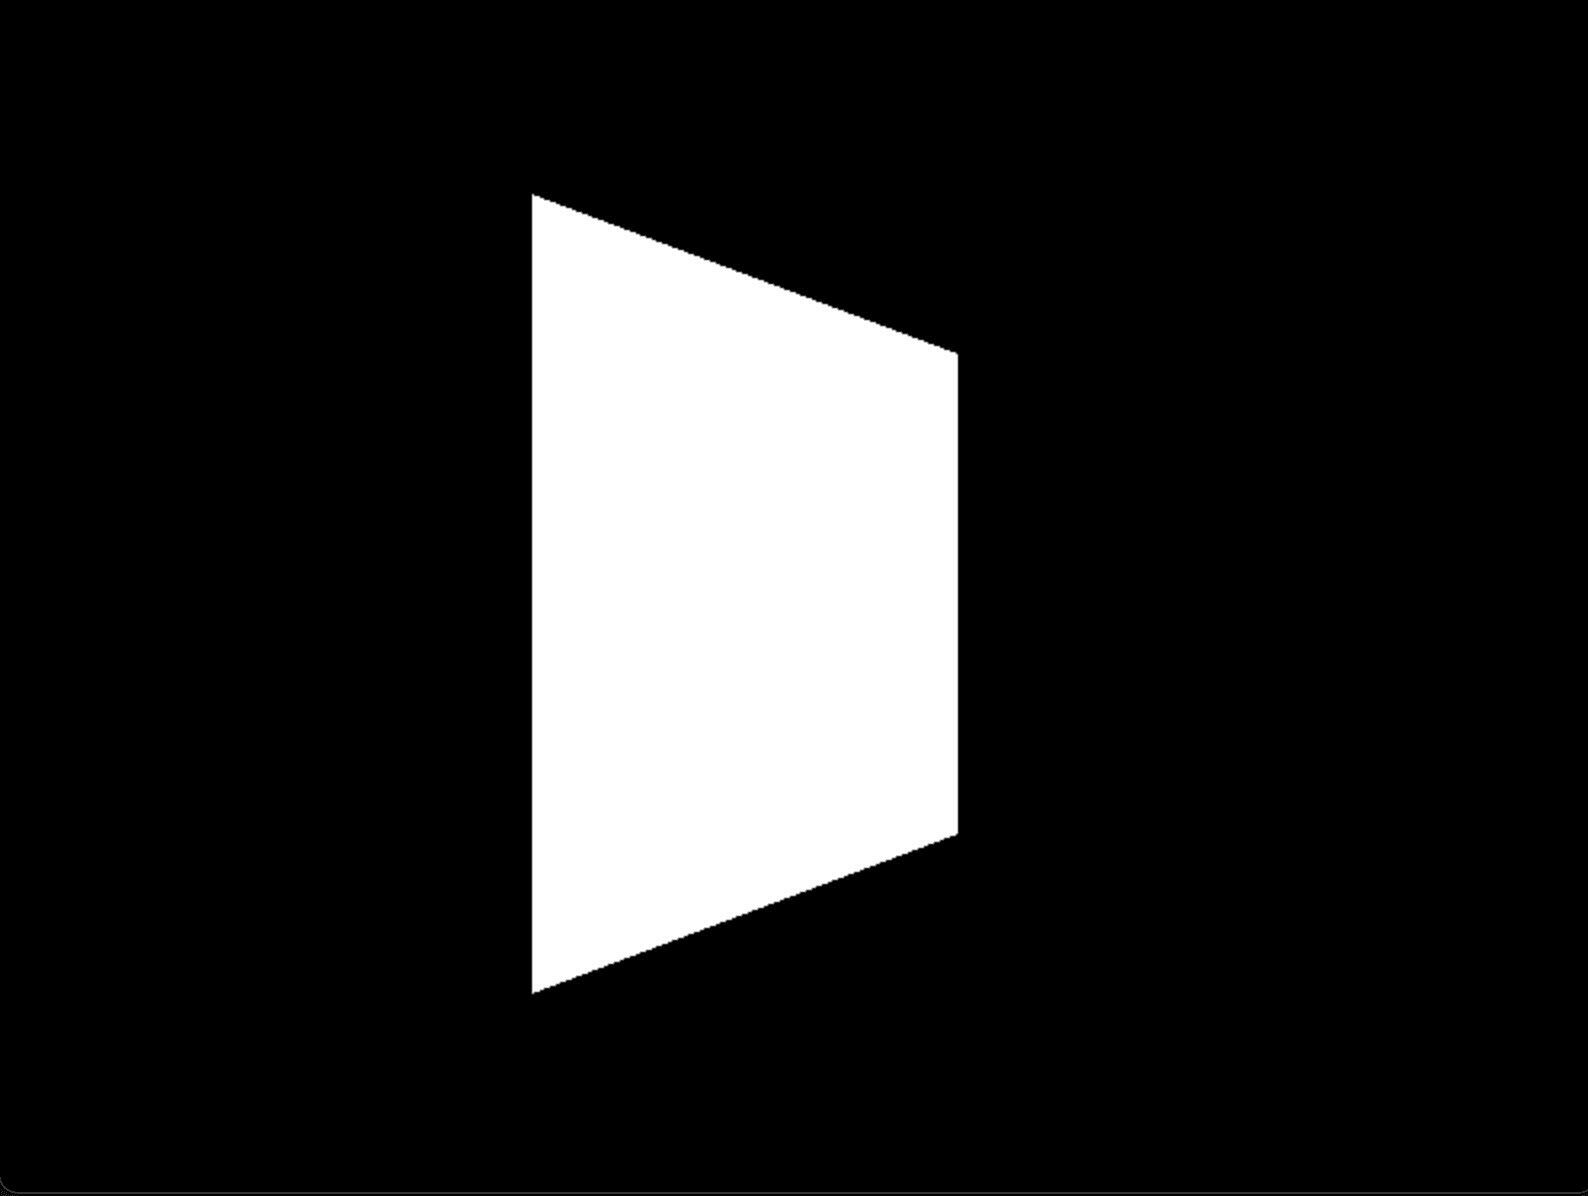
Our person or camera is located at and the wall data is listed as and . Visually, the left side of the wall will look taller since it's closer to the camera while the right side will look smaller since it's further. Here is my artist rendition of what it should look like.
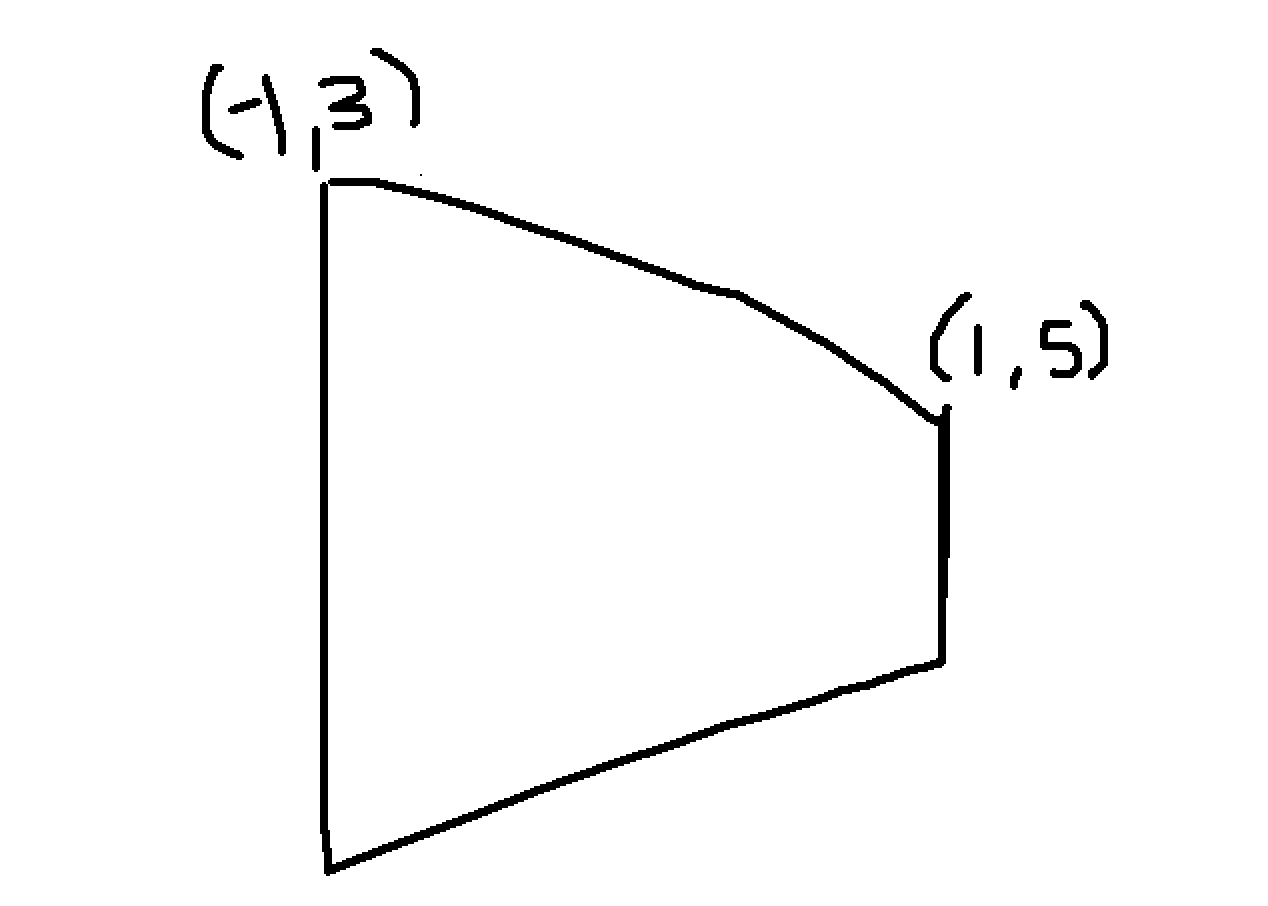
Two measurements are needed for each wall. The width of the wall, and the height of the left most column and right most column. Everything in the middle will be calculated automatically since we are going to draw a 4-sided polygon with 4 different coordinates.
Height Calculation
The height calculation is simple. The relationship between the distance and height are inversely proportional. The greater the distance, the shorter the height of the column should be. You might be asking, the distance from where? This should be the distance of the wall to the location of the camera, which is in the beginning. Normally, I would use Pythagorean theorem to find the distance. However, I'm not going to be implemeneting turning right now so we just need the difference between the camera y-coordinate and the wall y-coordinate. We just divide the screen height by the distance to get the height of the screen. This is what the function looks like:
int get_height(double x, double y) {
  double height = (SCREEN_HEIGHT / (y + state.player.pos.y));

  if (height < 0.0f) {
    return 0.0f;
  }

  return (int) height;
}
This is a very simple function with an additional check to make sure the height being drawn isn't negative.
Width Calculation
The other aspect of the projection calculation is where the column should be drawn horizontally on the screen. This is calculated a bit more complex. We can take a look at the top down view on Desmos to visualize this example more easily.
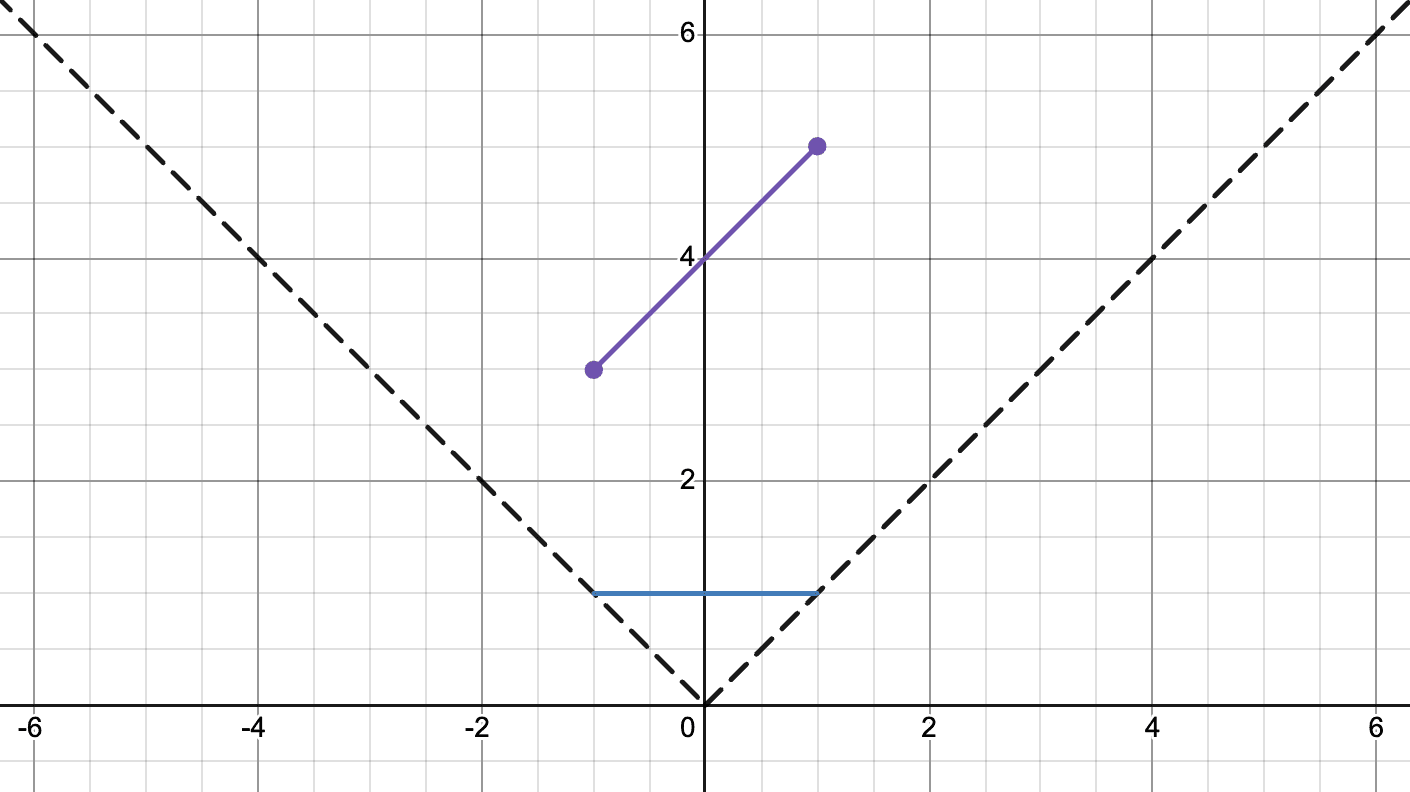
The blue line that has been added will represent the screen that we are projecting onto, which we will call the screen line. This will help us calculate the horizontal position of where we should draw on the screen. Drawing a line from the point we want to draw onto the screen and then taking the intersection with the screen line will help us find the horizontal position.
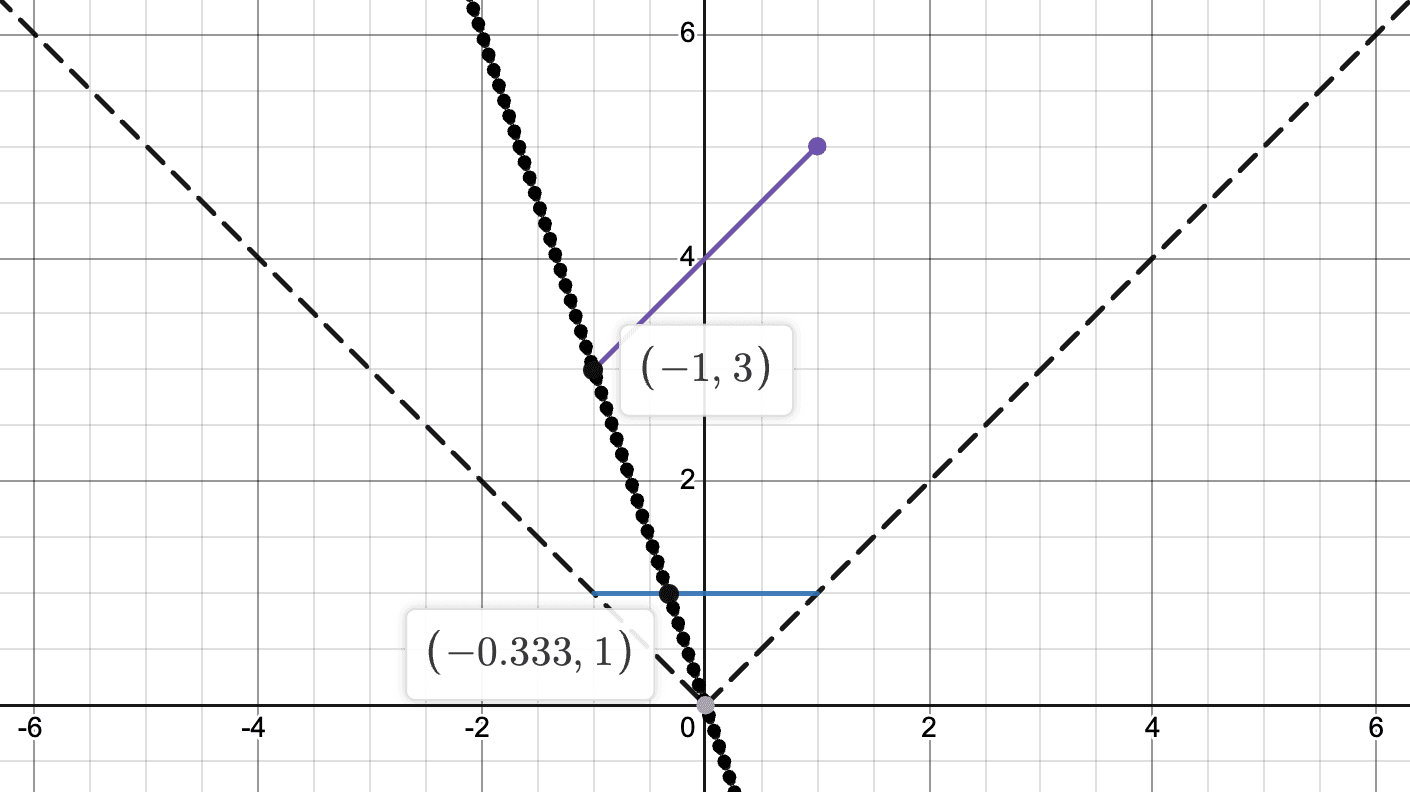
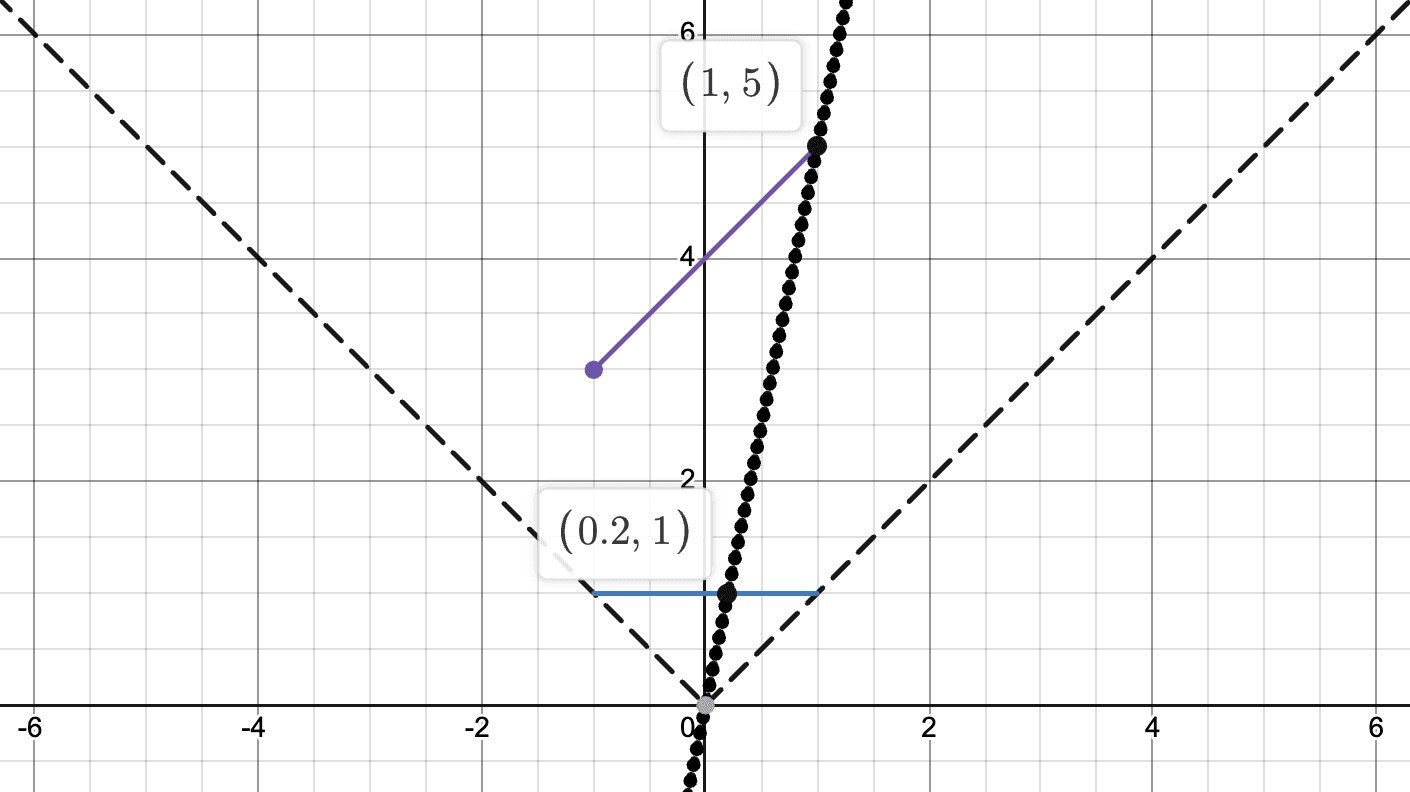
Hopefully these diagrams have helped you notice a pattern that has arisen. Each of these lines go through the origin which is where the camera is located. These lines can be represented by the equation , the equation of a line with since it passes through the origin. To find the x-coordinate of the intersection point with the screen line, we need to calculate for when since the screen line is just . This means is just the inverse of , or the inverse of the slope. Since this is normalized, we will multiply it with half of the screen width which will give us position to draw on to the screen.
float get_projection(float x, float y) {
  // const double distance = sqrt(pow(x + state.player.pos.x, 2) + pow(y + state.player.pos.y, 2));
  return (SCREEN_WIDTH / 2.0f) * ((x + state.player.pos.x) / (y + state.player.pos.y)) + (SCREEN_WIDTH / 2.0f);
}
This function is also quite simple but the thought behind it takes some more visualization to come up with. While the height calculation is pretty intuitive since the further things are the smaller they appear, finding the horizontal position to be the inverse of the slope between the origin and the point we're drawing is far less obvious.
Combining both of these calculations, we can finally see some walls drawn to our screen.
If you want to see the full source code, you can check it out on my GitHub.